

| |
| July 20-22, 2014: Herein begins the construction of my revision C dynafocal engine mount. [ Click Here ] to get the plans (1:1 scale PDF). Dyanafocal is a contraction of Dynamic Focus. It's just a fancy way to say that the rubber shock mounts are oriented to be tangent to the arc of engine torque/vibration rotation, the center of which is the center of mass of the engine. These bars position and orient the rubber to be compressed in the correct direction with very little sheer force placed on the mounting bolts. As you can see above left, it starts out as a 48" long bar of 1-1/2" x 3/16" A36 hot rolled steel cut to the lengths given in the plans and marked for drill holes and bends. Above right shows the bars drilled and bent at a residential, one-man machine shop 5 miles away. The owner/operator, Ken Oliver, works on all sorts of hydraulic pump repairs and creates precision machined parts for antique gas-engines. Charged me $60 for his hour of time. Cost of the steel was $7, but $15 to ship, so overall, $85 (including gas and paint) for this portion of the mount. | |

Bare steel needed painting to protect from rusting, so three light coats of Krylon gloss black, air dried over night and then baked in the oven at 170 F for an hour did the trick.
|
 Dry fit of the Barry Lord mounts confirms all measurements in the PDF plans are 100% spot on. I used 1/8" thick rubber mud flaps for the spacers called for in the plans. The 3/4" diameter neck of the upper Barry is around 3/8" long, thus needs the spacer to fill the gap left over from the 3/16" thick dynafocal bar. |

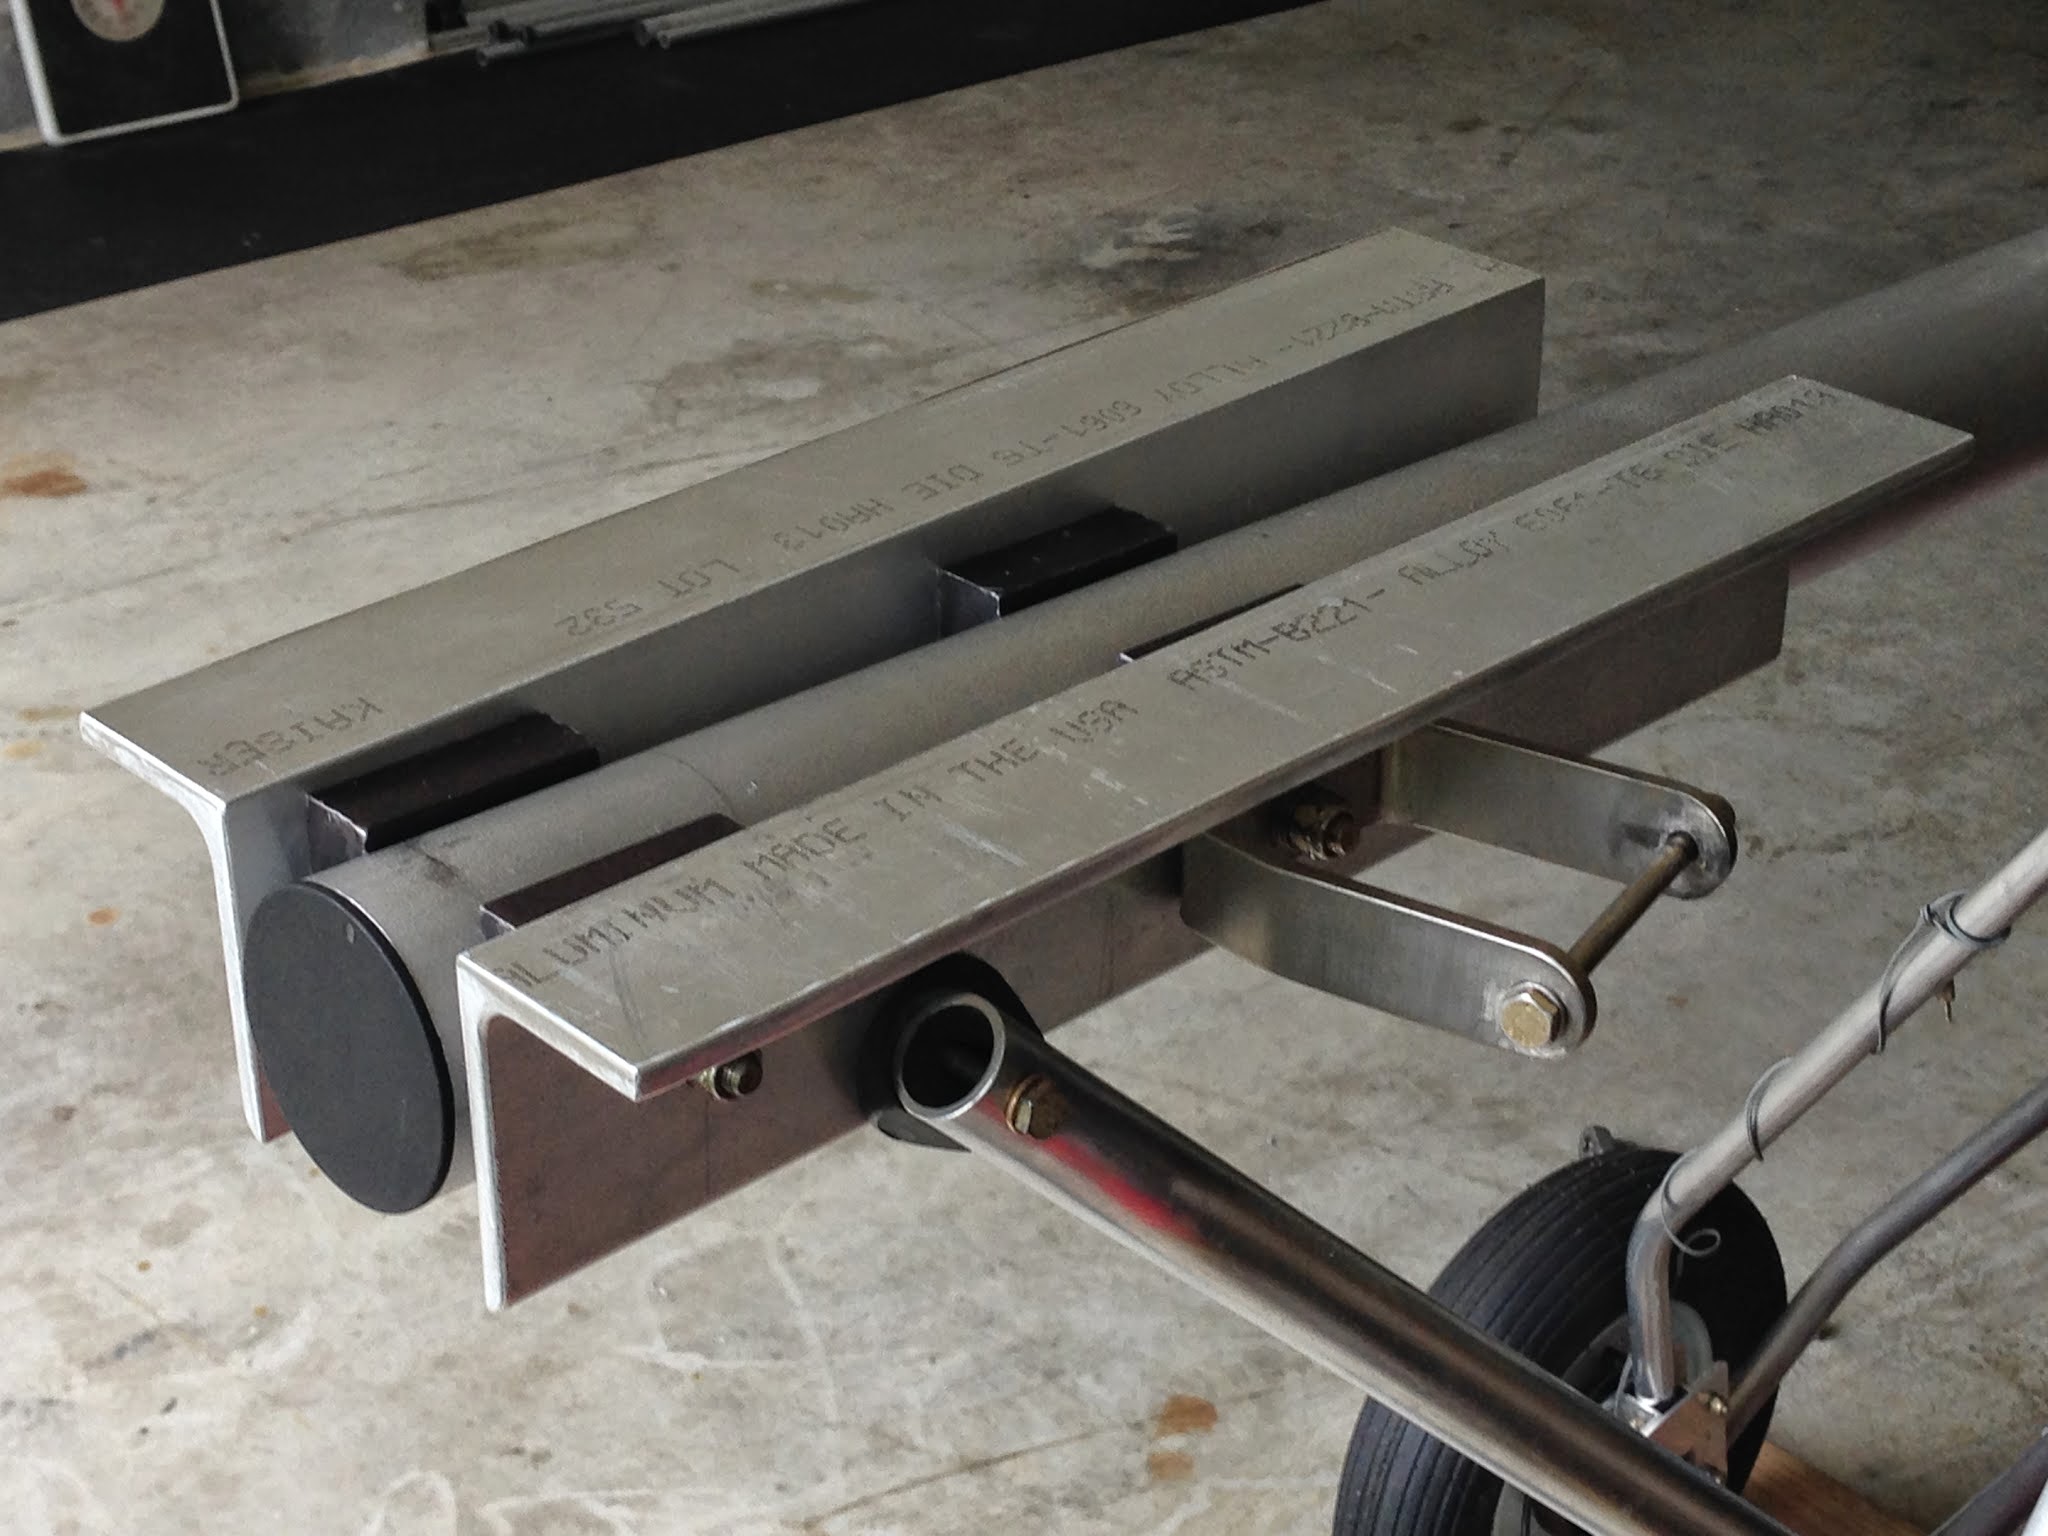
Dry fitting the engine mount brackets made from 2" x 3" 6061 T6 angle. You can just barely see the 6061 T6 2" ID schedule 40 anti-crush pipe inside the boom.
|
 Installation of the brackets and front fuselage brace attachments complete. Notice that the aft end of the engine mount is higher than the front. 2 degrees to be exact. Why? Because the wing will have a 3.25 degree incidence (trailing edge below the boom) and flies at a level cruise angle of attack of 5 to 6 degrees. The difference (5 - 3.25) is 2-ish degrees, meaning the tail (and thus the boom and engine mount) are at +2 degrees to the air stream. Tilting the engine down 2 degrees cancels this, putting the thrust line nearly parallel to the air stream. |

Bottom dynafocal bars installed.
|
 Upper dynafocal bars dry fitted for weighing. They will be installed on the engine, then the engine will be dropped in place. |

July 23, 2014:
Gave the Rotax 503 SCDI a thorough cleaning with Simple Green, sprayed her off gently with the hose, flipped her upside down, repeated, and after drying, installed the upper dynafocal bars. |
 The muffler was not being cooperative as it flopped around and would've gotten in the way of me picking the engine up, so I removed the safety wires from the springs and took it off. So much easier to lift her up and set her behind down on the brackets, then position her on the dynafocal bars. |

August 3, 2014:
Yes, that is a right hand pusher prop on a tractor engine. Loaned to me by a friend with a Kolb Firefly. It's only for loading purposes to test the engine that hasn't run in 4 years. Due to thrust being blown forward, I can only run her for a minute at a time or so (no air being blown IN to the free-air ram scoop). |
 And there she is... sputtering away at 2,500 rpm... sort of. She's running very rich and 4-stroking at low to mid rpms and bogs down past 3500. Only thing that's changed is the prop, so can't say definitively if that's the reason, or if the rubber seal on the enricher plunger is shot (it's indented with an imprint of the enricher tube seat), or if it's the DIY cereal box card board float bowl gasket (I KNOW, right! Silly, but all I could come up with at the time until I order the real thing!). |
 August 8, 2014
So, after ordering and installing a new air screw o-ring (original was pretty battered), new enricher piston (original was probably just fine), new silicone fuel bowl gasket***, and new throttle cable and housing (originals were rusted enough to make moving the throttle hard and sticky), she STILL ran rich -- 4-stroking at ALL throttle settings. Silly me had installed the Bing 54 carb's main needle with circlip on TOP of (inside) the slider spring cup, instead of UNDER it. Once I changed its position, she fired right up and purred like a kitty, just like she was doing when she abruptly fell silent on October 26, 2009. Lesson learned? Or will I forget this again? *** I ordered them from RealGaskets.com. I strongly advise that you DO NOT GET them, because they swell up by nearly 5% after only a day exposed to gasoline, which makes it impossible to re-seat, UNLESS you buy two of them. They DO return to normal size after drying out for a day or two, so plan your visit to the inside of the fuel bowl carefully so you always have one dry gasket available. |

August 10, 2014:
Instead of buying Rotax brand gasket at $3.50 or more each, I went to AutoZone and bought fuel-rated fiber gasket material and made my own. Simply traced the outline of the bowl, then added another outline inset 3mm or so and cut it out with an Exacto knife. |
 Dried silicon on the left (as in not swollen from exposure to gas). Home-made on the right. An engine test run up revealed a slight wetting of the fuel bowl, so I'll have to check the cut and fit for proper seating. UPDATE: Yeah, fiber gasket material is porous to gasoline, so I ditched them and went back to the silicone gaskets. I have the second one in my travel bag, just in case I have to do anything with the carb fuel bowl. I can swap out the swollen one for the dry one and let the swollen one "dry out," returning to usable size again for next time. |
  Installed a bubble-type carb fuel primer (the kind used on weedwackers and other gas-powered equipment), because two plunger-style primers that I previously mounted in the cockpit instrument panel leaked from a seam in the plunger body, despite being brand new, so I wasn't going to go down that road again. Installed a bubble-type carb fuel primer (the kind used on weedwackers and other gas-powered equipment), because two plunger-style primers that I previously mounted in the cockpit instrument panel leaked from a seam in the plunger body, despite being brand new, so I wasn't going to go down that road again.This one has been in service for 6 years without issue. After squeezing the bulb enough times to purge the air, I give it three or four plunges full of fuel, pull the starter twice, flip the ignition On, and she starts up on the first pull or two thereafter. Rinse and repeat if really cold and the engine sputters out. |
|
Super nice. Wish I could find a reasonable priced Rotax for my project...
ReplyDeleteMe Too....
ReplyDeleteWill this type mount work with a kawasaki 440, this engine was mounted hanging , can it be mounted on top? I know this is a sky hopper blog, but it seems you would be a person that could really help me get in the air.
ReplyDeleteWorks for any engine, just have to adjust hole spacings for the engine (top bar) and frame (bottom bar) attachments. The Barry mounts holes must remain the same in order for them to mate up.
ReplyDeleteI need a set of those motor mounts for my 447 Rotax. Do you have a contact name and number for the fabricator? Glad to pay $85. for those. Thanks..Rick
ReplyDeleteAnd...what about the dynafocal mount? Are you getting less vibration with it?
ReplyDeleteIt's hard to tell without the old, straight bar mount to compare to. I mean, anything that vibrates hard enough is going to transfer that energy into the structure supporting it, no matter how much rubber is used or how it's oriented.
Delete